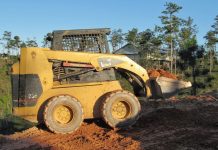
Are your rubber tracks worn out on one side and you need to replace them quickly? Have there been situations where the site mechanic was away and you had to stop working because your mini excavator wasn’t functional? Or do you just want your old steel tracks replaced with rubber tracks? Then you need to know some basic things about installing rubber tracks on a mini excavator to avoid any lag in your work.
Rubber tracks on a mini excavator or skid steer tend to deteriorate over time. To retain your machine’s efficiency, when you find signs of wear and tear you must learn how to install new rubber tracks.
Read on for tips on how to safety and effectively replace the tracks on your tracked vehicle.
Things to remember before starting
Some steps must be taken in order to ensure your safety.
First of all, make sure that you and your assistant are fitted with all the required safety equipment. The installation of rubber tracks is a two-person job, and it’s essential to set up your workplace by selecting a safe location and removing unnecessary machinery and distractions in your work environment.
Method
Here are basic steps to follow, but also refer to the operator’s manual. With the replacement track safely positioned nearby, do the following.
Step 1: Release the tension from the rubber tracks
Remove the grease valve with a wrench. Step down to collapse the idler on the bottom side of the track, releasing the tension on the track. This is a pretty good time to examine the grease fitting to evaluate whether to replace it or not.
Step 2: Remove the top carrier
Put a pin in the cleat. Turn on the vehicle and turn the track with the rear idler rolling over the pin. This will make the track adjuster collapse. Continue to rotate until you can remove the pin, taking care to clean up any grease that comes out. Make sure that the rear idler pusher is completely collapsed inside the tube before your put the grease valve back. Next, use a forklift or tool to pull off the top carriers.
Step 3: Raise the machine up
Next, take away the rear bottom roller triangle plates. Also, remove the linkage from the opposite track drive pump as a safety precaution.
Now you can raise the vehicle off the ground and place something underneath to support it. Remember, you only have to raise it high enough to remove the bottom cleats under the bottom rollers. Remove three of them if the sprocket is in sections and leave one attached. Just leave it as it is you only find one piece.
Placing a heavy duty jack is an important safety measure underneath the undercarriage as it helps to resist the enormous mass of the machine. This will protect your hydraulic system from hazards or accidents.
Step 4: Carefully remove track parts
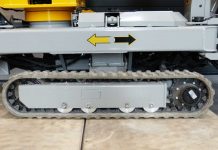
You should now be able to release one end of the track from where the sprocket teeth hold it in place. A pry bar will come in handy at this point. You can use it to remove the track from the sprocket teeth while the person helping you moves the vehicle forward slowly.
Step 5: Remove the entire track
Extract the track carefully from the rear idler and pull it out. Keep pulling the track from below the vehicle and off of the front drive housing, pulling with straps on each end of the track. Because the tracks weigh several hundred pounds, you’ll have to use a forklift to remove it completely and place it in another place.
You can use this time to inspect the undercarriage of the machine for signs of wear and tear or damage to components that are sensitive. For removing stubborn items, including dirt, rocks, and other debris, a pressure washer and rake can be used. ⠀Inspect any components that might need to be replaced soon.
Step 6: Install new track and track parts
The next step is to install the new track. Bring your new rubber track next to to the machine and precisely hook the rubber track onto the sprocket teeth at the back end of the machine with the help of your buddy.
When installing tracks on the bottom of the track, use pry bars to support the top of the track. Then push the cleat (not the rubber track itself) so the track slides under the rollers at the bottom.
Once the track is fully underneath the bottom rollers, lower the supports to secure the track. Rotate the track with two pins that fit the entire way inside the links and stretch 6 inches to the inside of the track. The track will guide itself in place if the pins are on the right side. Now install the bottom roller, put the triangle plates back and tighten the nuts. Now you can lower the vehicle to the ground and install the upper carrier rollers at last.
Step 8: Test the track movement
Once the front track has been installed correctly and the tracks are tightened, make sure the vehicle is repeatedly driven forward and backward. Check to see that the excavator’s tracks and other relevant parts move as normal.
Step 9: Bring the machine back down to the ground
Move to the track’s lower back side and slowly push the boom down to the ground. To lower the front of the track to the ground, lift the blade from this position.
If all these steps were done correctly, you have installed rubber tracks on your vehicle successfully.
Tracks and Teeth are one of the leading suppliers of tracks for skid steers, mini excavators and multi-terrain machines. We have experts to guide you in choosing the right tracks for your model. If you’re looking for replacement tracks for your rubber track machine, or any other machine attachment, please contact us today!
Please “click here” for a live tutorial on our Videos page


